Advertisement
Photos
Landscape Photography: Techniques for Breathtaking Scenery
So you’ve decided to venture into the world of landscape photography? Welcome aboard! If you’re anything like me, your initial foray into this fascinating field was probably filled with beautiful disasters—overexposed skies and blurry mountains, anyone? Fear not! We’re going to transform your camera-wielding experience into a symphony of natural beauty! Whether you’re coming from smartphone photography or diving in with a professional-grade DSLR, there’s a whole world of techniques, tips, and tricks waiting for you. And let me tell you, the results are so worth it once you get the hang of it.
Why Landscape Photography?
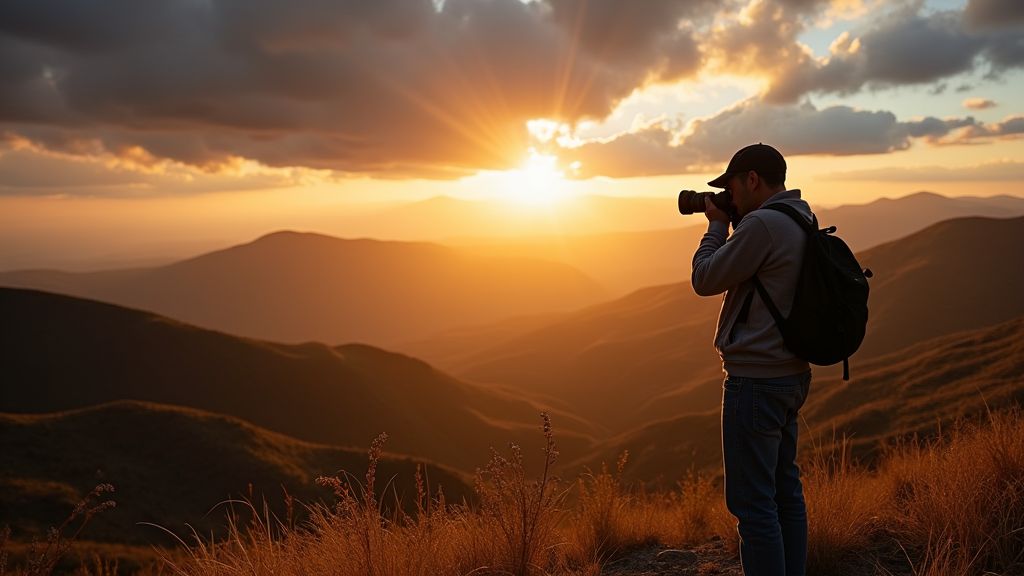
First things first, why embark on this journey? Landscape photography not only allows you to capture captivating scenery but also encourages you to explore the great outdoors, clear your mind, and rejuvenate your soul. A win-win situation if we ever saw one! You’d be surprised how therapeutic it can be to stand in the midst of a valley or on a windy cliff, camera in hand, patiently waiting for the sun to drench the horizon in a blaze of color. More than just creating a pretty picture, each shot becomes a personal memory, a frozen moment in time that speaks to your inner adventurer.
In today’s fast-paced digital age, we all need an excuse to slow down and appreciate the natural world. Landscape photography does precisely that—it forces you to look for compositional elements in your surroundings, to be present in the moment, and to truly connect with nature. Many photographers describe it as a form of meditation; the calmness that envelops them while they wait for the ideal lighting is unlike anything else. Additionally, you’ll find that outdoor photography helps you build resilience. In this realm, you will often face unpredictable weather conditions, tricky terrain, or even the occasional curious wildlife encounter. Overcoming these challenges—big or small—can be immensely rewarding.
Furthermore, landscape photography provides ample creative freedom. You choose the scene, the lighting conditions, and the mood you want to convey. You can shoot a spectacular sunset one day and a moody, overcast mountain scene the next. The variety is endless, and the thrill of chasing the perfect shot becomes an ongoing adventure. It can also serve as a gateway to other types of photography. Once you’ve mastered landscapes, you might feel more comfortable experimenting with astrophotography, macro, or even wildlife photography. The skills you develop—like understanding light, composition, and timing—will all come in handy no matter which direction you branch out to in the future.
The Golden Hours: Timing Is Everything
In landscape photography, timing can be as important as the subject itself. Enter the ‘Golden Hours’—those magical periods shortly after sunrise and just before sunset. The light is softer, less concentrated, and casts beautiful long shadows, providing a dramatic and awe-inspiring effect. Something extraordinary happens during these celestial moments. It’s like Mother Nature has flipped on God’s Instagram filter just for you. The warm, diffused glow can make even the simplest scene—say, a lone tree in a meadow—look surreal and full of depth.
What makes the Golden Hour so distinctive? The sun is at a lower angle, which reduces harsh contrasts and gives the sky a vibrant tint that transitions from orange to pink to purple, depending on your location and weather conditions. Photographers often plan their entire day around these moments. Tools like weather apps, sunrise/sunset calculators, and even specialized photography apps (e.g., The Photographer’s Ephemeris) can help you plan out exactly where and when the sun will rise or set. Keep in mind that the exact duration of the Golden Hour changes with seasons and latitude. In winter, for example, these precious minutes of soft light may last longer in higher latitudes, whereas summer might offer quicker transitions.
“The best camera is the one you have with you.” – Chase Jarvis
That being said, don’t lock yourself into the golden hour exclusively. Sometimes a stormy sky or foggy morning can paint the scene in moods you’d never expect! A midday sun can still yield interesting highlights if you use shadows creatively or focus on patterns in nature. The idea is to remain flexible. Try to wake up early and see what awaits you at dawn, or stay out late to capture the night sky. By doing so, you’ll discover that each time of day (or night) comes with its unique palette of colors and emotions.
Compositional Keys: Rule of Thirds and Beyond
Sure, you’ve heard of the Rule of Thirds—imagine dividing your frame into nine equal parts with two horizontal and two vertical lines. The idea is to place your subject along these lines or at their intersections. Your viewer’s eyes will find this arrangement naturally pleasing. But don’t stop there! Explore other compositional methods like leading lines—paths, rivers, or fences directing the eye toward your focal point, adding depth and perspective to your image.
Beyond these basics, consider experimenting with negative space or balancing elements. Negative space is the area around your main subject. Sometimes leaving vast stretches of sky or water in your composition can emphasize the smallness of a mountain cabin or tree, giving a sense of scale and drama. Similarly, pay attention to symmetry. Certain scenes, like reflections in a lake or a symmetrical arrangement of trees, can look particularly striking when captured head-on. Another trick is to explore your vantage points. Instead of snapping your photo from eye level, crouch down or even climb a rock to get a fresh perspective. You’d be amazed how shifting a few feet can completely transform the visual story of your shot.
Lastly, remember that rules—like the Rule of Thirds—are there to guide you, not to confine you. Once you understand them thoroughly, feel free to bend or even break them creatively. Some of the most unforgettable images come from photographers who dare to step outside the conventional norm. The key is to develop an eye for composition and to keep experimenting.
Choosing the Right Gear
Let’s address the flashy elephant in the room—gear. Do you need a fancy DSLR to shoot quality landscapes? Not necessarily. Today, many smartphones boast cameras equipped to produce stunning shots. If you’re looking to upgrade your gear, a camera with a wide-angle lens and a good tripod to stabilize your shots under low-light conditions will suffice. Remember, the secret ingredient is you—the photographer!
That said, if you plan to make photography a serious hobby or a professional venture, you might consider investing in a mirrorless or DSLR camera. The larger sensor sizes typically handle low light better, and interchangeable lenses let you adapt to various scenarios. A wide-angle lens (like 16-35mm on a full-frame camera) is popular for capturing sweeping vistas. Telephoto lenses (like 70-200mm) can also be invaluable for compressing distances and picking out interesting details in a vast landscape, such as a cluster of trees or a single mountaintop bathed in sunlight.
Don’t forget the importance of a sturdy tripod. While it might add some extra weight to your gear bag, the stability you gain is worth it—especially if you’re shooting in windy conditions or attempting long exposures. Look for one that’s lightweight but durable enough to handle rough terrain. Carbon fiber tripods are popular for striking a good balance between sturdiness and portability. And yes, a remote shutter release can be handy, but if you’re on a budget, use your camera’s self-timer feature to minimize shake. Ultimately, the best setup is the one you can comfortably carry and use for extended periods of time.
Filters: Enhancing, Not Overwhelming
When used wisely, filters can be your secret weapon. A polarizing filter, for instance, helps reduce reflections from non-metallic surfaces like water and glass while deepening the sky’s blue hue. Neutral density (ND) filters are excellent in long exposure settings, allowing you to capture flowing water or moving clouds with a silky, ghostly magic that words fail to describe.
But with great power comes great responsibility—filters can just as easily ruin a photo if overused or incorrectly applied. For example, a strong polarizer might create an unnatural gradient in your sky if you’re shooting with a wide-angle lens. Similarly, stacking too many filters can introduce vignettes or color casts, diminishing the quality of your image. Graduate ND filters, which darken only part of your frame (usually the sky), can also be lifesavers in high-contrast situations. Instead of blowing out your highlights, you can balance the sky with the foreground to achieve a well-exposed image.
The trick is to see filters as tools for subtle enhancement rather than radical transformation. Use them to gently nudge the image towards what your eyes experienced on location, not to create something drastically different. Overly saturated skies or unnaturally dark corners can distract the viewer from the real story you want to tell.
Patience is Your Best Friend
At times, waiting for the light to change, the fog to lift, or even animals to wander into your frame can feel like an eternity. But patience, my friends, is your most reliable accessory. One iconic shot often requires trying multiple times, tweaking your settings, or simply enduring a bout of chilly wind. Keep persevering, and you’ll capture that magic moment.
Patience also translates to careful observation. When you arrive at a location, don’t just whip out your camera and start firing away. Take a few moments to walk around, look for interesting angles, and absorb the atmosphere. Perhaps a hidden footpath leads to a vantage point with a breathtaking view. Or maybe the sun’s rays peek through the trees in a certain spot, adding a soft glow to the scene. These details can be missed if you’re in a hurry. By slowing down, you’re more likely to stumble upon unique perspectives that others might overlook.
Moreover, weather can be your best friend or your worst enemy. You might show up on location expecting a golden sunrise, only to be met with gray skies and relentless rain. Rather than pack up and leave, consider sticking around to see if a break in the clouds occurs. Sometimes a moody, stormy sky can lend unparalleled drama to your shots. And if the weather turns truly sour, at least you can scout the area for future visits or practice some macro shots of raindrops on leaves.
Post-Processing: The Finishing Touch
Think of post-processing as the makeup of your landscape photo. Just like a light blush can enhance someone’s natural beauty without transforming them into a circus clown, subtle post-editing can transform your picture from nice to iconic. Tools like Adobe Lightroom or even mobile apps can be used to balance exposure, color, and contrast. Just don’t go overboard—aim for enhancing reality, not creating fantasy.
A solid post-processing workflow might start with adjusting your white balance, followed by exposure corrections. Then, you might gently tweak the highlights and shadows to reveal more detail in both the sky and foreground. Vibrance and saturation sliders should be handled with care—remember, you don’t want neon trees or an unnaturally hued sky. Finally, consider adding a little clarity or texture to give your image some extra pop. For those who love drama, a subtle vignette around the edges can pull the viewer’s eye toward the center of the frame, but again, subtlety is key.
Advanced techniques include focus stacking (combining multiple images shot at different focal distances for maximum sharpness) and exposure blending (merging various exposures for a balanced final image). The level of complexity in post-processing is up to you. Some photographers love spending hours fine-tuning every pixel, while others prefer a quick edit that stays true to the moment. Whichever camp you fall into, remember that less can often be more when it comes to editing nature’s already-impressive palette.
Answering Your Concerns
You might wonder, “What if I’m just not inspired by my surroundings?” Fear not! Inspiration can strike in the most mundane of places. Cityscapes, local parks, or even your backyard might have just the narrative waiting for you to uncover. Train your eye, practice regularly, and soon you’ll find muses where you least expect them.
Another common concern is “What if I don’t have a lot of time?” The beauty of landscape photography is that even short trips or weekend getaways can yield remarkable images. Use your lunch break to explore a nearby park, or get up half an hour earlier to see if the sunrise is offering a special show. Some of my own favorite shots were captured spontaneously, without elaborate planning. It’s all about learning to see the opportunities around you. Additionally, if you’re pressed for time and can’t travel far, focus on local landmarks or seasonal changes in your own neighborhood. As your passion grows, you might schedule more extended excursions to mountains, deserts, or coastlines that really push your creativity.
Technical barriers can also feel daunting: “How do I master manual mode?” or “Which aperture should I use for maximum sharpness?” The short answer: practice and research. Delve into online tutorials, photography forums, and local workshops. Experiment with different settings—yes, even the ones that yield unsuccessful results. Each ‘failure’ teaches you something about your camera and your style. Over time, you’ll develop muscle memory for adjusting shutter speed, aperture, and ISO to match the scene in front of you.
Lastly, consider the value of community. Share your photos online, join local photography clubs, or befriend other photographers on social media. Not only can they provide constructive feedback, but they can also become your go-to companions for photo walks and trips. Plus, there’s nothing quite like geeking out over gear or lighting with someone who understands your excitement!
Your Next Steps
Now, with camera in hand and tips in mind, venture into the great wide open. Start snapping those breathtaking landscapes, explore your environment, and let your creative juices flow. Who knows? Maybe someday, someone will be asking you for advice! And don’t let the initial challenges deter you; every masterpiece is a result of patience, practice, and a dash of luck. Remember to experiment with different weather conditions, times of day, and compositions. Keep a photography journal or notes on your phone to track what worked and what didn’t. Over time, these notes will become invaluable references, helping you recall the settings and conditions that produced your best images.
I want to hear your stories. What challenges have you faced in landscape photography, and how did you overcome them? Share your experiences and pictures, and let’s keep this conversation rolling! After all, part of the fun is in the shared journey. Engage with fellow enthusiasts, learn from their trials and triumphs, and stay curious. Before you know it, you’ll have a collection of stunning landscape shots that fill you with pride—and maybe even adorn your walls or a future photography portfolio.
Finally, remember that the world is filled with limitless beauty, just waiting to be captured and shared. Whether you find it in a sprawling mountain vista or in a hidden urban garden, there’s always another moment, another angle, another slice of light that can make you fall in love with photography all over again. So gear up, stay persistent, and let your passion guide you to places you’ve never imagined!


